A convenient way to periodically backup your docker volumes with Borg
15 Mar 2019Introduction
This article has been updated early 2026. It’s a great way to test the full process in a local environment first. If you are already comfortable with Docker and sysadmin tasks, feel free to directly check the Github repository.
I have 2 small dedicated servers which I use to host web applications running in docker containers. The context of each app is defined in a single docker-compose.yml file which provides all the benefits docker and docker-compose can offer.
Running self-hosted applications on docker, one of the challenges I wanted to solve was how to backup the volumes safely (without causing trouble to the running applications) and efficiently.
This article will demonstrate the solution I came up with leveraging Borg Backup, cron and Ansible.
Requirements
My requirements were as follows - this solution must:
- Make use of open-source software only.
- Support encrypted backups.
- Support deduplicated backups.
- Perform operations before the backup (I have in mind the creation of database dumps that could be backed up at the same time).
- Run as a service of the Docker compose stack. This way, running
docker compose downshould not only remove the application from the server but the backup service as well, preventing myself to update a crontab as soon as I add or remove new services - which surely I am going to forget. - Run in a container, because:
- It is not recommended to interact with volumes directly form the host filesystem. If you refer to the docker documentation, you will find their recommendations.
- I want to avoid as much as possible to install new software on my server as I am trying to keep dependencies to a minimum. Restarting everything from scratch becomes a breeze.
After looking around I quickly found Borg that ticks the first 3 boxes and much more. Have a look at its features. For the 4th point, I decided to use Ansible to run the backup as well as extra operations. I find it easy to use, with resulting playbooks much easier to read and upgrade than bash scripts in my opinion, plus I don’t have to log anything as Ansible will provide a nice output by itself. As for the rest, I did it myself and wrote the necessary Dockerfiles to run the Ansible playbooks periodically.
Backup Nextcloud volumes as an example
This tutorial will backup a dockerized Nextcloud application as a use case.
To make it simple to test, all instructions required to set up everything on a local machine are provided below. Although it is even better if you already have a running docker stack with volumes you want to back up, as well as a machine you can sshed into and that will host the backups. In that case jump to this section. You can apply the same instructions as below: just update the IPs and ssh keys related to the machine you want to back up to.
Here comes a picture of what will be covered:

You can get the entire setup directly from this github repository.
The Nextcloud stack
Create a docker-compose.yml file with the following content:
volumes:
  mysql:
  data:

services:

  mysql:
    image: mysql:8.4
    environment:
      MYSQL_ROOT_PASSWORD_FILE: /run/secrets/mysql_root_password
      MYSQL_USER: nextcloud
      MYSQL_DATABASE: nextcloud
      MYSQL_PASSWORD_FILE: /run/secrets/mysql_password
    volumes:
      - mysql:/var/lib/mysql
    secrets:
      - mysql_root_password
      - mysql_password

  php:
    image: nextcloud:32.0.3-fpm-alpine
    volumes:
      - data:/var/www/html
    depends_on:
      - mysql

  nginx:
    image: nginx:1.29.4-alpine
    ports:
      - 8042:80
    volumes:
      - data:/var/www/html
      - ./nextcloud-nginx.conf:/etc/nginx/nginx.conf
    depends_on:
      - php

secrets:
  mysql_password:
    file: secret_mysql_password.txt
  mysql_root_password:
    file: secret_mysql_root_password.txt
Create a file named nextcloud-nginx.conf with this content
Then run these commands after editing the passwords:
echo "KilmpodG65" > secret_mysql_password.txt
echo "F4gTYjukI" > secret_mysql_root_password.txt
docker compose up -d
Wait for the mysql container to be initialized. You can do so by running
docker compose logs -f mysql
If you can see “MySQL init process done. Ready for start up” you are good to go.
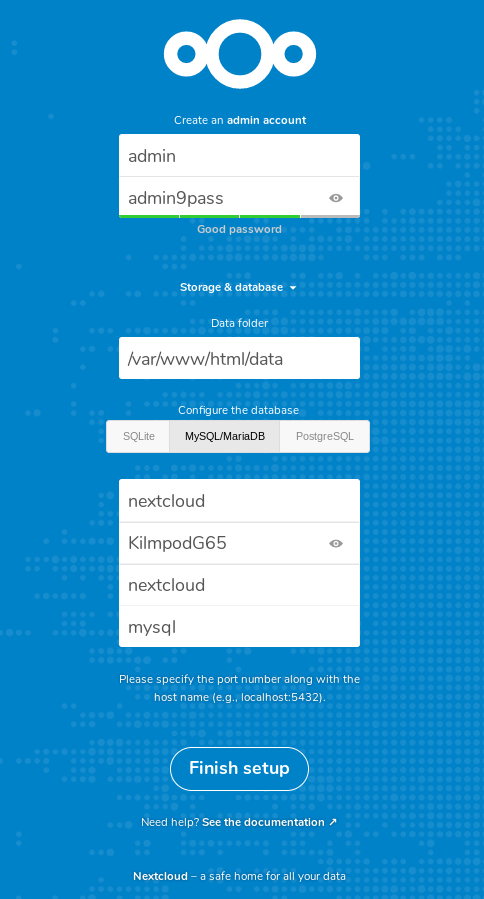
Browse http://localhost:8042/ then fill in the form. Hit finish setup and… be patient. You should have Nextcloud running in a few minutes.

Preparing the backup server
It is recommended to have Borg installed on your backup machine. Follow this guide.
For this example let’s just install it locally. On my laptop running on ubuntu bionic it is as simple as:
# python3-pyfuse3 is only useful if you want to mount borg repositories in a folder. See related "borg mount" documentation online.
sudo apt install borgbackup python3-pyfuse3
borg --version
The container that will send backups needs an SSH access to the backup server. Let’s create a new ssh key pair on the machine running your containers. This one will need to be without passphrase as it will be used in a cron.
ssh-keygen -f ~/.ssh/id_ed25519_borg_backup -t ed25519 -N ''
Now - on your server - authorize this key.
touch ~/.ssh/authorized_keys
chmod g-w ~
chmod 700 ~/.ssh
chmod 600 ~/.ssh/authorized_keys
Copy the content of the public key at the end of the ~/.ssh/authorized_keys file.
If the entire setup is in local, this makes it easy:
cat ~/.ssh/id_ed25519_borg_backup.pub >> ~/.ssh/authorized_keys
Obviously make sure you have an ssh server running on your server.
sudo apt install openssh-server
Adding the borg backup service
Update the docker-compose.yaml file
services:

  ...

  backup_cron:
    image: ovski/borgbackup-cron:v2.0.0
    volumes:
      - data:/var/docker_volumes/nextcloud/app/data
    environment:
      SSH_CONNECTION: backup_user@your.server.net
      PRIVATE_KEY_PATH: /run/secrets/backup_server_user_private_key
      BORG_REPO_PATH: /home/backup_user/borg_repositories
      BORG_REPO_NAME: nextcloud
      LOCAL_FOLDER: /var/docker_volumes/nextcloud
      MYSQL_USER: nextcloud
      MYSQL_HOST: mysql
      MYSQL_DATABASE: nextcloud
      MYSQL_PASSWORD_FILE: /run/secrets/mysql_password
      SSH_KNOWN_HOSTS: your.server.net,38.26.55.241
    secrets:
      - backup_server_user_private_key
      - borg_passphrase
      - mysql_password

secrets:

  ...

  backup_server_user_private_key:
    file: secret_backup_server_user_private_key.txt
  borg_passphrase:
    file: secret_borg_passphrase.txt
There are a few changes we need to apply:
- Update the SSH_CONNECTION environment variable.
Use whichever user you want to use on your backup server. In my case it will be baptiste. Update the server IP or domain names (Same explanation as below).
- Update the SSH_KNOWN_HOSTS variable with the backup server IP and/or domain names.
On my ubuntu laptop, running hostname -I | awk '{print $2}' on the command line prints the host IP which is reachable from within containers. You might also get the piece of information by running ip a and look for the docker0 network.
-
Update the BORG_REPO_PATH variable. Set it to whichever path you want your backups to be send to on your backup server.
-
In case you are using your own Docker stack which does not contain a mysql service, you must get rid of the MYSQL environment variables.
-
The parent folder that will contain your backups needs to exist beforehand. On the backup server run
mkdir /home/your_user/borg_repositories. On my laptop that will bemkdir /home/baptiste/borg_repositories. -
Finally create the secret files secret_backup_server_user_private_key.txt and secret_borg_passphrase.txt:
cat ~/.ssh/id_ed25519_borg_backup > secret_backup_server_user_private_key.txt
echo "mysuperpassphrasefortheborgnextcloudrepo" > secret_borg_passphrase.txt
chmod 400 secret_backup_server_user_private_key.txt
Here is what I personally have:
services:

  ...

  backup_cron:
    image: ovski/borgbackup-cron:v2.0.0
    volumes:
      - data:/var/docker_volumes/nextcloud/app/data
    environment:
      SSH_CONNECTION: baptiste@172.17.0.1
      PRIVATE_KEY_PATH: /run/secrets/backup_server_user_private_key
      BORG_REPO_PATH: /home/baptiste/borg_repositories
      BORG_REPO_NAME: nextcloud
      LOCAL_FOLDER: /var/docker_volumes/nextcloud
      MYSQL_USER: nextcloud
      MYSQL_HOST: mysql
      MYSQL_DATABASE: nextcloud
      MYSQL_PASSWORD_FILE: /run/secrets/mysql_password
      SSH_KNOWN_HOSTS: 172.17.0.1
    secrets:
      - backup_server_user_private_key
      - borg_passphrase
      - mysql_password

secrets:

  ...

  backup_server_user_private_key:
    file: ./secret_backup_server_user_private_key.txt
  borg_passphrase:
    file: ./secret_borg_passphrase.txt
Moment of truth
Run docker compose up -d followed by docker compose logs -f backup_cron. Every 30 minutes, you should see the following output:
backup_cron_1 | KEEPALIVE CHECK [2026-01-10 01:30:01]
This means our cron works fine!
OK that’s cool. Unfortunately the cron is setup by default to run every night at 1AM. You might not want to wait this late to ensure the backup runs smoothly. Edit the docker-compose.yml file another time by overriding the default command like this:
services:

  ...

  backup_cron:
    image: ovski/borgbackup-cron:v2.0.0
    ...
    command: /var/backup_script.sh
Let’s have another round of docker compose up -d and docker compose logs -f backup_cron.

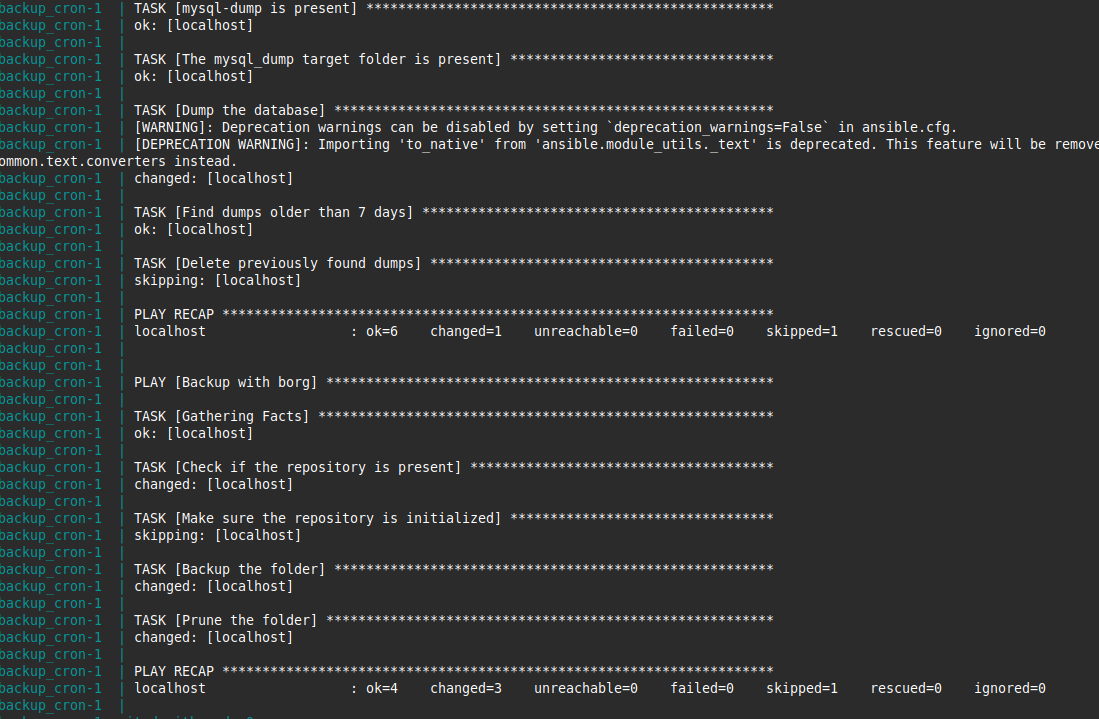
Wait for the script to end and the container to stop. You should eventually have a backup available. Let’s check it out:
cd /home/your_user/borg_repositories
borg list nextcloud
Enter your passphrase (mysuperpassphrasefortheborgnextcloudrepo). You should see the list of backups! Now let’s check what’s inside by mounting the repo in a folder:
mkdir mount_point
borg mount nextcloud::nextcloud_2026-01-01_22-46-29 mount_point
ls mount_point/var/docker_volumes/nextcloud
That’s where the .sql dump should be, as well as an app folder containing all the Nextcloud files backed up. Run borg umount mount_point to unmount the folder before deleting this tutorial’s files.
If you are not familiar with borg already, head to the documentation
Additional Options
Since the original creation of the ovski/borgbackup-cron Docker image, many new options have been added, including:
- The ability to specify the schedule at which the backup should run.
- Options for creating PostgreSQL or MongoDB dumps, in addition to MySQL.
- Email notifications via SMTP in case of errors, so you can be alerted quickly.
For more information, the README.md in the GitHub repository will remain the most up-to-date resource. I encourage you to read it if you are interested. You can open an issue on GitHub to request new features or report a bug.
And if this article has been helpful to you, don’t hesitate to star the repo as a thank you! ⭐

