Running your own ngrok with docker
02 Feb 2019Introduction
A while ago, I read a post explaining how to run a self hosted ngrok. To be honest I did not even know what ngrok was at the time.
It turns out ngrok is a service that allows you to make your websites running in local available to the internet. Pretty cool. This is really convenient to quickly test how well a website works on a mobile phone.
The rub is, it took me at least 1 or 2 hours to get this solution working. This was mostly caused by some missing piece of information without which I could not get it to work on my laptop.
Indeed I had to change my SSH configuration. When possible I am always trying to prevent touching my configuration files. As I don’t keep these files versionned I know I’m going to forget these settings as soon as possible.
After a bit of a struggle I successfully reached my local application from an other network. I was really excited about it and decided to dockerize the setup in order to:
- prevent editing configuration file for a single purpose
- provide a disposable solution
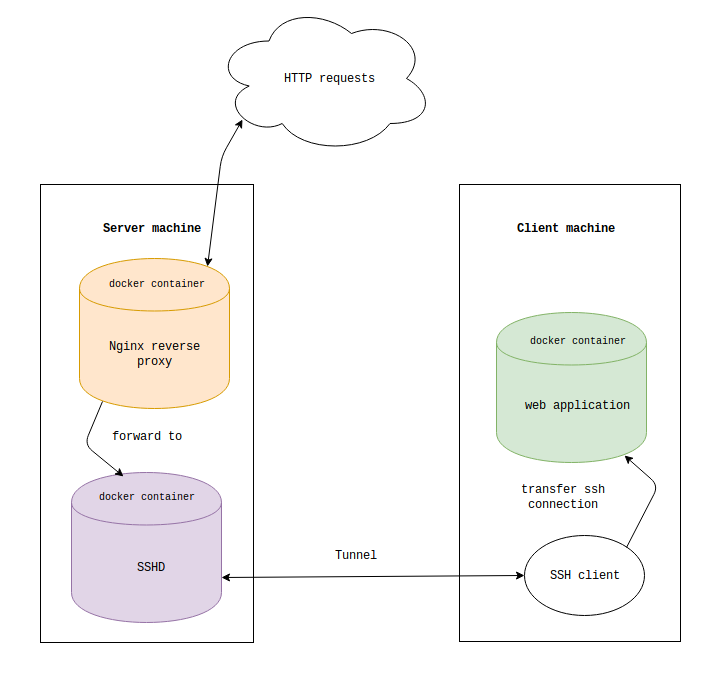
Let’s picture it.

After writing this post I found out I was not the only one inspired by the previous post. Here is a link to another similar article.
You can get all files used in this tutorial from this github repository.
Requirements
- docker and docker-compose installed both on your local machine and on your server
Setup server side
- Let’s create the following docker-compose.yml file on the server.
I decided to expose ports 8082 and 2222 assuming you might already have ports 80 and 22 used by a web and SSH server.
version: '3.7'

services:

  nginx:
    image: nginx:1.15.8
    ports:
      - 3333:3333
      - 8082:80
    volumes:
      - ./nginx_app.conf:/etc/nginx/conf.d/default.conf

  ssh_reverse_tunneling:
    build:
      context: .
      dockerfile: Dockerfile_sshd
    ports:
      - "2222:22"
In case you are very picky as well as very observant you might wonder: why the quotes for port 2222 but not for ports 8082 and 3333? Well if - not only being picky and observant - you are curious as well, have a look at this issue that explains why for once I had to wrap this particular port between quotes: https://github.com/docker/compose/issues/3109
- As referenced in the docker-compose file, you also need to create a file named Dockerfile_sshd.
Follow the documentation to get more information on this one. Do not forget to change the password.
FROM ubuntu:16.04

RUN apt-get update && apt-get install -y openssh-server
RUN mkdir /var/run/sshd
RUN echo 'root:youyoupassword' | chpasswd
RUN sed -i 's/PermitRootLogin prohibit-password/PermitRootLogin yes/' /etc/ssh/sshd_config
RUN echo 'AllowTcpForwarding yes' >> /etc/ssh/sshd_config
RUN echo 'GatewayPorts yes' >> /etc/ssh/sshd_config

# SSH login fix. Otherwise user is kicked off after login
RUN sed 's@session\s*required\s*pam_loginuid.so@session optional pam_loginuid.so@g' -i /etc/pam.d/sshd

ENV NOTVISIBLE "in users profile"
RUN echo "export VISIBLE=now" >> /etc/profile

EXPOSE 22
CMD ["/usr/sbin/sshd", "-D"]
The only things I changed from the docker docs are
gatewayportsandallowtcpforwardingset to yes. More about this on this page
- Finally, just as Jacob Errington in his blog, create a specific nginx_app.conf
server {
    access_log /var/log/nginx/$host;

    location / {
	    proxy_pass http://ssh_reverse_tunneling:3333/;
	    proxy_set_header X-Real-IP $remote_addr;
	    proxy_set_header Host $host;
	    proxy_set_header X-Forwarded-For $proxy_add_x_forwarded_for;
        proxy_set_header X-Forwarded-Proto https;
	    proxy_redirect off;
    }

    error_page 502 /50x.html;
    location = /50x.html {
	    root /usr/share/nginx/html;
    }
}
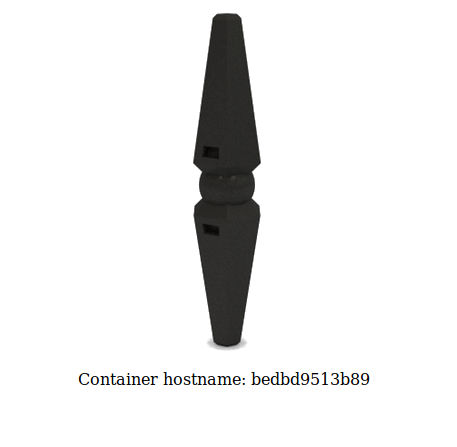
Still on your server, run docker-compose up -d and reach your server in a browser on port 8082. Let’s say http://your.server.net:8082/
Here is what you should get:

Setup client side
On the client side, we just need a local application running on any port.
You can quickly run one in a container:
docker run --rm -p 8888:80 rothgar/microbot:v1
Let’s glue everything together by running the following command:
ssh -N -R 0.0.0.0:3333:localhost:8888 root@your.server.net -p 2222
I strongly encourage you to read Jacob Errington’s post which will explain this command better than I could do.
Type your password (youyoupassword if still not changed…) then browse http://your.server.net:8082/ once again.

Done! Your local application is now available on external networks!
If you found this tutorial helpful, star this repo as a thank you! ⭐

